Understanding Your Plunger: The Good, the Bad, and the Nasty
Introduction: Meet Your Trusty Clog Slayer
Ah, the humble plunger. It sits quietly in the corner of your bathroom, waiting for its moment of glory. It’s the unsung hero of household plumbing, the last line of defense against the dreaded clog. While it may not be glamorous, this rubbery warrior has saved countless homeowners from messy, embarrassing, and sometimes horrifying situations.
Yet, despite its simple design, many people misuse their plungers, have the wrong type, or (gasp!) don’t even own one. If that sounds like you, don’t worry. Today, we’re diving deep—pun absolutely intended—into the world of plungers. We’ll explore the different types, when to use them, how to avoid common plunger-related mistakes, and, finally, how to clean and store your plunger so that it’s always ready for action.
The Different Types of Plungers and Their Uses
Not all plungers are created equal! If you’ve been using one plunger for every clog in your house, you might be doing it wrong. Here’s a breakdown of the different types of plungers and when to use them.
1. The Classic Cup Plunger (A.K.A. The Sink Plunger)
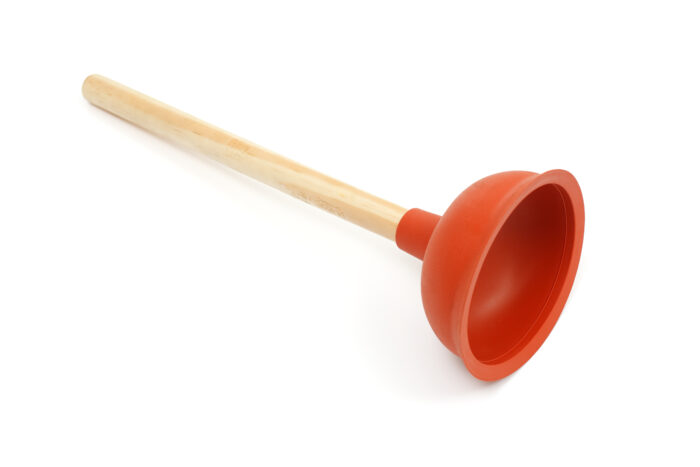
The OG of plungers, the classic cup plunger, features a simple rubber cup attached to a wooden (or plastic) handle. This is what most people picture when they think of a plunger.
Best for:
- Sinks
- Bathtubs
- Shower drains
Not great for:
Toilets (we’ll explain why in a second)
2. The Flange Plunger (A.K.A. The Toilet Plunger)
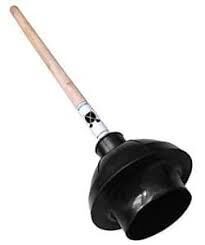
This plunger has a little extra rubber lip (or flange) inside the cup. That added extension allows it to create a tighter seal in curved toilet bowls, making it far more effective than a standard cup plunger.
Best for:
- Toilets (seriously, don’t use anything else!)
Not great for:
Sinks and flat-surfaced drains (the flange gets in the way of forming a proper seal)
3. The Accordion Plunger (A.K.A. The Heavy-Duty Plunger)
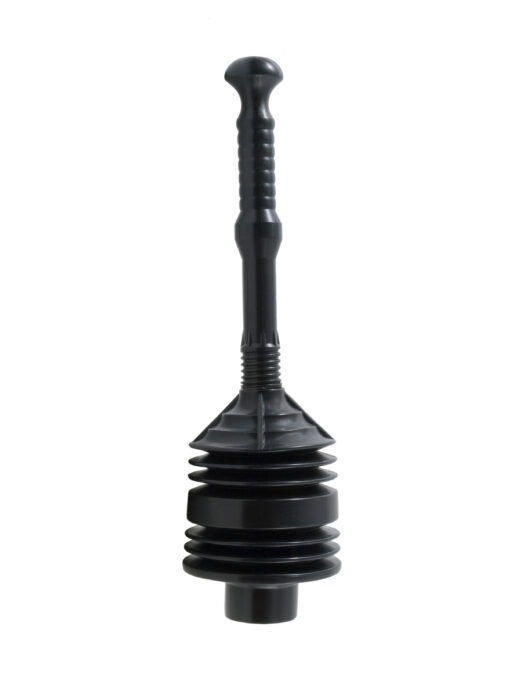
This bad boy is made of hard plastic and is specifically designed for high-powered toilet plunging. It can generate more force than a standard flange plunger but requires a bit more effort to use.
Best for:
- Stubborn toilet clogs that won’t budge with a regular flange plunger
Not great for:
Anything else (seriously, don’t try this on your sink unless you want water everywhere)
4. The Taze Plunger (A.K.A. The Professional’s Plunger)
This is a specialized plunger used mainly by plumbers. It has a metal rod that pushes pressure directly into drain pipes to dislodge deep clogs.
Best for:
- Industrial or commercial drains
- Stubborn clogs in main drain lines
Not great for:
Everyday household use (unless you’re running a DIY plumbing business out of your garage)
Plunging 101: How to Use a Plunger Properly
Now that you know the different types, let’s talk about technique. If you’ve been vigorously stabbing at your toilet bowl like a medieval knight in battle, you might want to rethink your strategy.
- Choose the right plunger. If you’re dealing with a toilet, use a flange or accordion plunger. For sinks and tubs, stick with a cup plunger.
- Create a proper seal. The key to effective plunging is suction. Make sure the rubber cup completely covers the drain and forms a seal.
- Add water if necessary. If there’s not enough water in the toilet bowl or sink to submerge the plunger, add some. This helps create a better seal and more force.
- Use steady, firm motions. Push down gently at first to expel air, then use strong, even thrusts. Avoid jerky movements.
- Don’t give up too soon. Some clogs take persistence. Try for a good 30-60 seconds before you admit defeat.
- Test the drain. If water starts flowing freely, congrats! If not, you may need to repeat the process or escalate to a plumbing snake.
Plunger Fails: What NOT to Do
Let’s go over some of the biggest plunger mistakes people make so you don’t end up making a mess.
- Using the wrong plunger – We covered this, but it’s worth repeating: flange plungers for toilets, cup plungers for sinks.
- Not forming a seal – If air is leaking in and out, your plunger isn’t doing its job.
- Plunging with too much force – Believe it or not, you can actually break pipes if you go full Hulk mode.
- Not wearing gloves – Plunging is gross. Protect yourself.
- Not disinfecting the plunger after use – We’ll cover that next, but please, for the love of hygiene, don’t just toss it back in the corner uncleaned!
The Nasty Side: Cleaning and Storing Your Plunger
After saving the day, your plunger deserves a little TLC. Here’s how to clean and store it properly.
How to Clean Your Plunger
- Rinse it off in the toilet – If you’ve used it for a toilet clog, give it a few swishes in clean toilet water before moving on.
- Disinfect with bleach – Fill a bucket with hot water and add some bleach. Soak the plunger for a few minutes.
- Scrub if necessary – If it’s particularly gnarly, use an old brush to scrub away any residue.
- Rinse thoroughly – You don’t want leftover bleach dripping all over your bathroom floor.
- Let it dry – Store it somewhere well-ventilated until it’s completely dry.
Where to Store Your Plunger
- Avoid just setting it on the floor – Get a dedicated plunger holder or at least a plastic container.
- Keep it in an accessible location – There’s nothing worse than needing a plunger ASAP and realizing it’s buried under the sink behind 30 rolls of toilet paper.
- Store it upright – This prevents residual water from pooling at the base, which can lead to mold and nasty smells.
Conclusion: Give Your Plunger the Respect It Deserves
Your plunger may not be glamorous, but it’s one of the hardest-working tools in your home. Knowing how to choose the right one, use it properly, and take care of it will ensure that when disaster strikes, you’re ready. So go forth, fearless clog warrior, and wield your plunger with confidence! But if you find that you still can't get that nasty clog conquered, give us a call. Our team can fight for you and defeat the toughest of tough plumbing problems.